beauty
Want to make your sourdough starter but need help figuring out where to start?
Worry not!
This article explores the creation of a sourdough starter, where each starter is prepared with the utmost hard work and love; this brings the essence of old traditions.
Making sourdough isn't just about baking; it's about infusing ingredients into your bread for a signature tang and resilient texture.
You can make perfectly seasoned sourdough with easy steps, the correct measurements, and keen patience.
Wait no more — let's find out how to make a perfect sourdough!
Understanding Sourdough Starter
Before we set off on creating a sourdough starter, let's first unravel the scientific principles that govern it. A sourdough starter is a fermented flour and water concoction teeming with wild yeasts and lactobacilli.
These wild yeasts enable the bread to rise, while the lactobacilli produce lactic acid, which imparts the bread with its unique tangy taste. These tiny organisms feast on the sugars in the flour, producing carbon dioxide gas, alcohol, and organic acids. The carbon dioxide gas finds itself trapped within the dough, leading to its rise and the formation of the bread's characteristic light and airy texture.
Ingredients
Flour:
While you can use any flour to make a sourdough starter, whole grain flours such as whole wheat or rye are often suggested as they contain more nutrients and natural yeasts. However, all-purpose flour can also be used, which may result in a milder flavour.
Water:
It's best to use filtered or dechlorinated water, which should be at room temperature because chlorine can inhibit the growth of wild yeasts and bacteria.
Equipment
● Container: A glass or plastic container is ideal for making your sourdough starter. Avoid using metal containers, which can react with the acids produced during fermentation. The container should be large enough to allow the starter to expand as it ferments.
● Kitchen Scale: While unnecessary, a kitchen scale can help you accurately measure your ingredients, especially when starting.
● Mixing Spoon: Any spoon will do for mixing your starter. Some people prefer wooden spoons, but a regular tablespoon works fine.
● Breathable Cover: The container needs to be covered with a breathable cover, such as a cloth or a coffee filter; this allows air to circulate while keeping out dust and insects.
Day 1: Initial Mixing
On the first day, blend 50 gm of flour with 50 gm of water in your chosen vessel. Stir the mixture until you can no longer see any dry specks of flour. The mixture should resemble a dense batter in its consistency. Shield the vessel with a cover that allows air to pass through and let it rest at room temperature for an entire 24-hour cycle.
Day 2: First Feeding
As you enter the second day, you may notice the formation of tiny bubbles; this is a positive indication, suggesting that the wild yeasts are beginning to stir into action. Whether you spot these bubbles or not, it's time to proceed with the initial feeding.
Dispose of half of the starter (approximately 50 grams) and then introduce 50 grams of flour and 50 grams of water to the remaining starter. Stir thoroughly until the flour is completely blended in. Cover it and allow it to rest at room temperature for another 24-hour cycle.
Day 3 to Day 5: Regular Feedings
You'll continue the feeding process over the next few days. By now, your starter should be showing clear signs of activity. It should be bubbling and may have a pleasant sour smell. Every day, discard half of the starter and include 50 gm of flour and 50 gm of water. Remember to stir well after each feeding.
Day 6 and Beyond Maintaining Your Starter
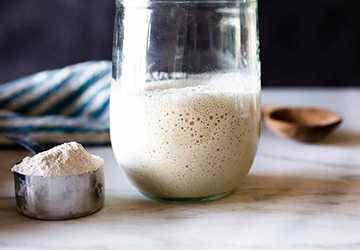
Your starter should be lively and primed for baking by the sixth day. A few hours after feeding, it should double in volume and emanate a pleasing, mildly tart aroma. From this point forward, you can maintain daily feedings if you plan to bake regularly. If not, you can securely store this starter in the refrigerator and nourish it once a week.
The refrigerator's relaxed environment decelerates the fermentation process, reducing the frequency at which your starter needs feeding.
The Importance of Temperature and Humidity
The environment in which your sourdough starter grows can significantly affect its development. Yeasts and bacteria thrive in warm, humid conditions.
Therefore, keep your starter in a relatively warm place in your home, ideally between 70-75°F (21-24°C). Place a water bowl near your starter to increase humidity if your home is dry.
Feeding Your Starter with Different Types of Flour
While your sourdough starter can be initiated with any variety of flour, introducing different types of flour during the feeding process can result in new flavours and textures. For example, rye flour can infuse your starter with a more robust flavour, whereas bread flour, owing to its high protein content, can lend more vitality to your starter.
The Role of Starter in Sourdough Bread
In sourdough bread, the starter serves two primary roles. First, it leavens the bread, making it rise. Second, it imparts a characteristic tangy flavour to the bread. The longer the dough ferments, the spicier the bread will be.
Reviving a Neglected Starter
If you've neglected your starter for a while, don't worry; it's resilient! To revive a neglected starter, discard all but a small amount and begin the feeding schedule again. It might take a few feedings for your starter to become active again.
The Benefits of Sourdough Bread
Bread crafted from sourdough holds several advantages over its commercially yeasted counterparts. Not only is it more straightforward to digest, but it also boasts a reduced glycemic index. Moreover, the fermentation process that sourdough undergoes enhances the accessibility of various nutrients present in the flour.
Using Discarded Starter
Don't throw away your discarded starter! Many recipes call for discarded sourdough starters, such as pancakes, waffles, muffins, and even pizza dough.
Conclusion
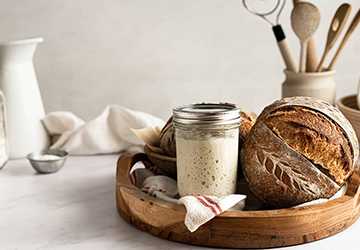
So, there it is—the art and science of creating your sourdough starter; it's not as complicated as it seems! It's a journey that requires patience, care, and a dash of adventurous spirit. But the reward—a loaf of freshly baked sourdough bread, its crust crackling and warm, its interior perfectly chewy and imbued with that characteristic tangy flavour—is worth every moment.
So, roll up your sleeves, embrace the process, and join the ranks of artisan bread bakers. Your sourdough journey starts here. Remember, every great bread begins with a lively starter, and every starter tells a story. What will your story be? Happy baking!
04/15/2024
